It is a well-known fact both inside and outside of the United States (U.S.) that many Americans don’t possess passports. As Indian citizens living abroad with work visas, getting a passport for our newborn baby was one of our topmost priorities. After all, the little one has a large extended family waiting to meet her. Besides that, we are so eager to show her the world. She had already traveled to Mexico City, Florida, Berkshires, India, and Maldives inside mommy’s belly.

Paperwork of any sort can often be a hassle. That’s why knowing what’s expected and having a checklist on hand can make the process so much simpler. As new parents, we know that time is precious – so here goes:
1. Take an appointment at your nearest USPS (not UPS) that accepts passport applications
This is, of course, the most important step and there are two key things to note here. I have listed USPS as the easiest place to get your child’s passport since you will likely have one of their post offices in your town/city center that accepts passport applications. Alternatively, you can search for other accepting centers using the U.S. Department of State’s passport acceptance facility page.
The second aspect is to make an appointment either after you have your baby’s social security card and original birth certificate or at a future date assuming that the two documents will be in your hands by then. You will need it for DS-11 and appointment (explained in a bit more detail below).
Luckily we have a USPS center literally a 10-minute walk away and which is also open on Saturdays. We took Raahi to visit our town’s adjoining farmers market which also takes place every Saturday. Thankfully our appointment at the USPS office took about 15 minutes.
Here’s how we ensured that our application goes through smoothly:
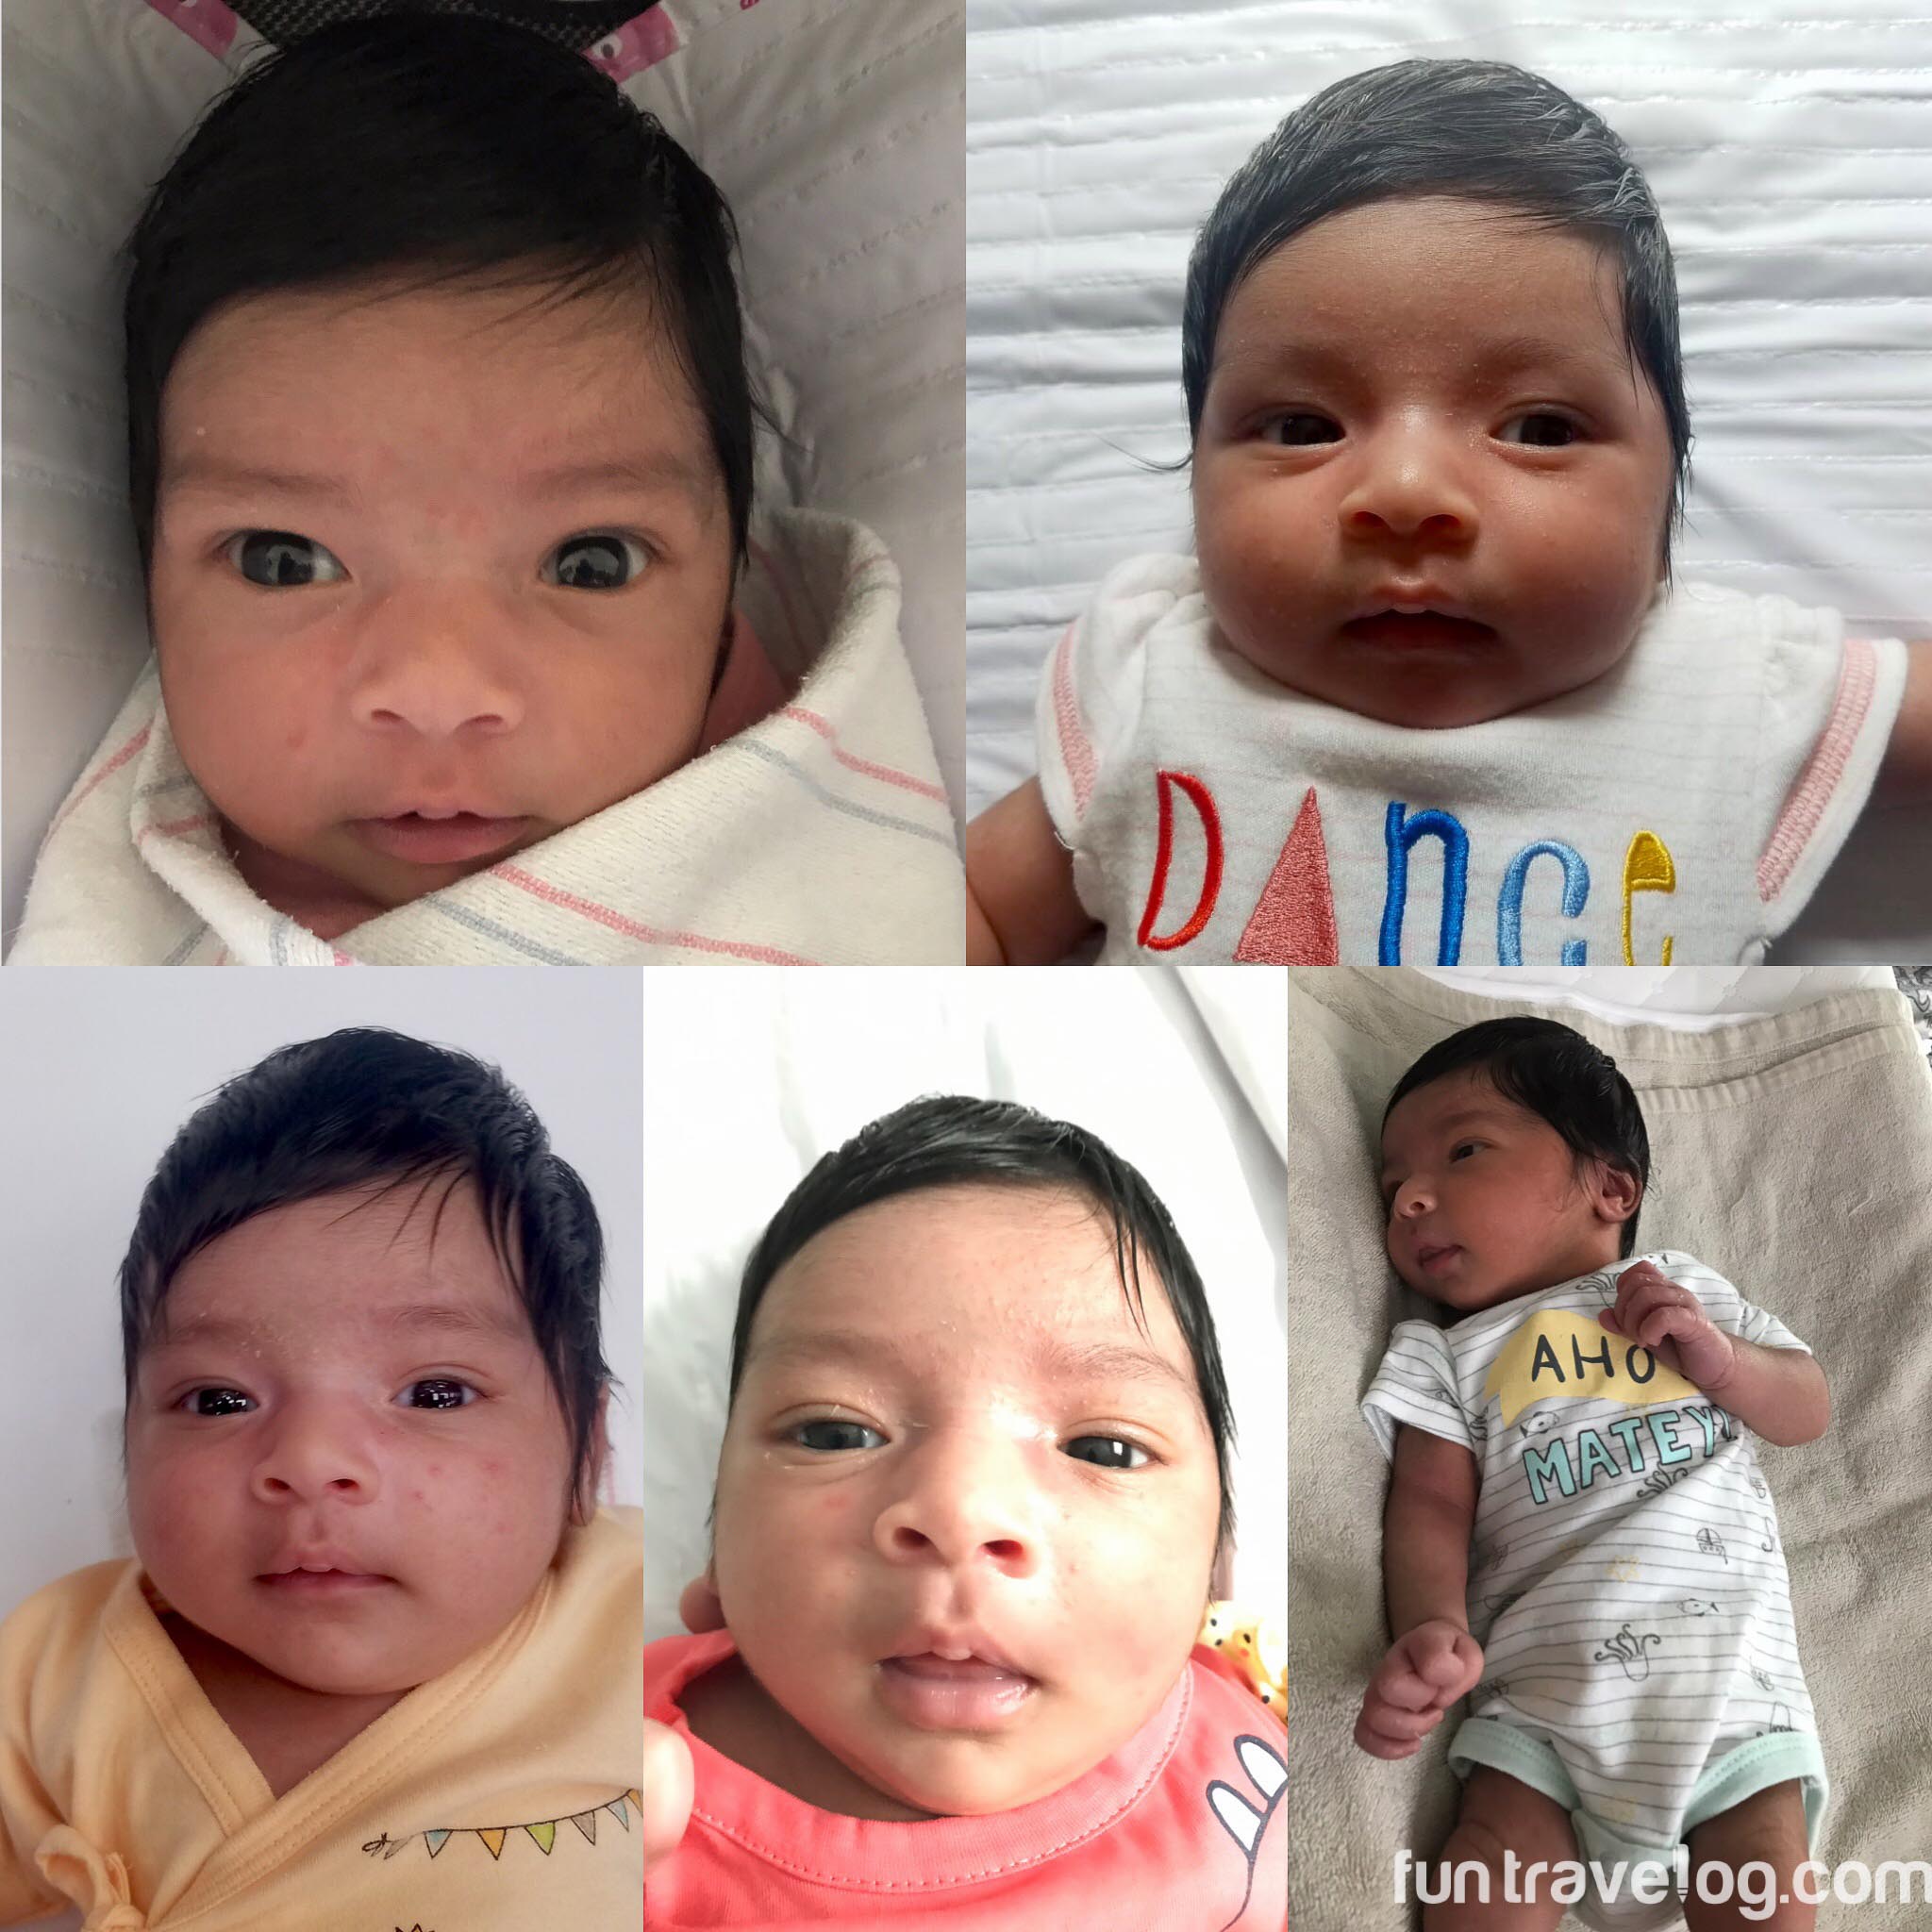
2. Baby’s passport photograph
The guidelines for taking an infant’s photo are somewhat relaxed. But still, the photo should:
- be on a white background
- have the baby looking straight, eyes open and ears visible as much as possible
- measure 2×2 inch
We had a few fun and not-so-fun attempts at trying to take Raahi’s photo. Sometimes her eyes would close, or she would not look straight and start crying if we tried too hard. We eventually managed to get a shot after about six or seven attempts. Using this free tool, we cropped and downloaded the photo and ordered a 4×6 print from CVS for 35 cents. Much better than paying $15 to CVS or USPS for doing the same stuff 😀
The representative at USPS took a look at the photo and was convinced that it would work.
3. Have the original birth certificate ready
We ordered Raahi’s birth certificate online from our City Registrar’s website for $14 bucks. Some prefer to visit the town hall with the baby to collect it. The choice is all yours.
But the bottom line is that you need to carry the original and a photocopy for the appointment.
4. Fill up DS-11 and print it. Don’t sign it yet
This official US government website lists the steps and the link to obtain form DS-11. Once we had Raahi’s Social Security Number and birth certificate in hand, we filled up the form online and printed it per the guidelines (basically A4 paper and not double-sided prints). The person in charge at the appointment will ask the parents to take an oath and then have both sign the form in front of him/her.
We only applied for the passport book, not the card ($80 check payable to US DOS and $35 to USPS). Even the lady at the post office mentioned that it’s not too much of a value add to get the card as it is only acceptable for land and sea border crossings between the U.S., Canada, Mexico, Bermuda, and the Caribbean. The passport book is what you need for international air travel and works fine for land/sea crossings too. #Avoidclutter
5. Both mom and dad should go and carry original + copies of your valid ID/passport
If just one parent goes, there is some extra paperwork involved (like authorizing the other parent to co-sign and notarize). However, this blog is about the easiest way to get things done. Long story short- both mum and dad should go with the baby, carrying original and photocopies of their valid IDs.
We used our State issued IDs and that worked. Alternatively, you can carry your passport too.
6. Go for your appointment
Armed with all the paperwork, we took Raahi for an 11 AM appointment. She was quite stimulated for the initial 10 minutes. Luckily the office was quite empty and the lady got us off in like 15 minutes.
We had Raahi in our arms while taking the oath of providing correct information to the best of our abilities for her application.
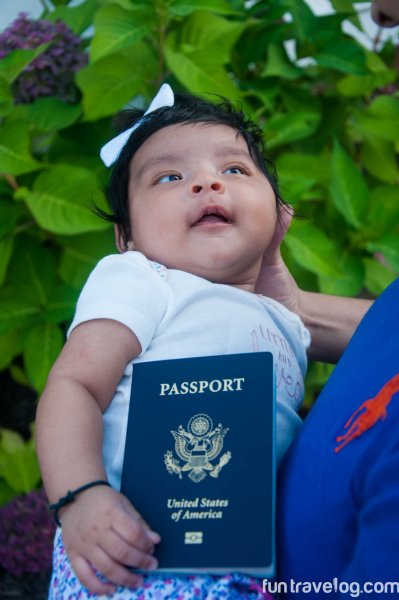
7. Wait for that passport in the mail
Unless you’re in a major rush (which means paying extra $$), they say it takes 6-8 weeks for the blue book to arrive in the mail, However, we received it in about four weeks. The girl is ready to pack her bags already (errrr I mean her diaper bag)!
If you are ever anxious, this link can be used to check the status of your application.
You’re now ready to fly!
We are excited to take Raahi to visit our extended family in India, followed by a trip to the Yucatan region of Mexico. You can follow more of our updates on IG and of course, we promise to continue to blog our experiences (good or bad) here as well.
- One Week Dolomites Itinerary with Kids - July 25, 2025
- The best place to see turtles in Costa Rica - January 4, 2022
- Tips on renting a car in Costa Rica - December 6, 2021


Leave a Reply